
If you are using CloudFlare (the CDN) and want to add our WAF/Firewall protection to your website, this guide should help you get that configured.
There is one known issue you should be aware of before proceeding:
Sucuri Firewall (D)DoS Protection will still work when CloudFlare is in place, however we are unable to block (D)DoS attackers’ IP addresses using the IDS (Intrusion detection System) because the IP addresses hitting us are from CloudFlare, which we can’t block on a network level. This network design limitation decreases the (D)DoS Protection efficiency.
Often due to our caching technology and global Anycast CDN, an additional CDN will not improve performance further for most sites.
Now, let’s proceed to the steps. We’ll need to set up the following:
- Sucuri Firewall pointing to your hosting provider, as normally it is.
- CloudFlare pointing to the Sucuri Firewall.
Note: If you find this process complicated, open a support ticket and we’ll help you set up.
Step by Step
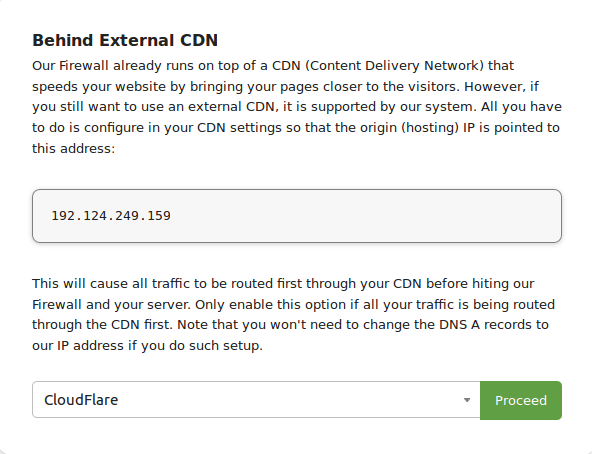
1) Enable the CDN option on the Sucuri Firewall dashboard setting it to CloudFlare. Just like this image:
2) On the Sucuri Firewall side, make sure that the Hosting IP address is actually pointing to your hosting company IP address and not CloudFlare.
If the site was previously live at CloudFlare when you added it to Sucuri Firewall, you will need to manually edit the hosting IP address to point to your web server.
3) Inside CloudFlare’s Zone File for your domain, add our Firewall IP address as the main A record:
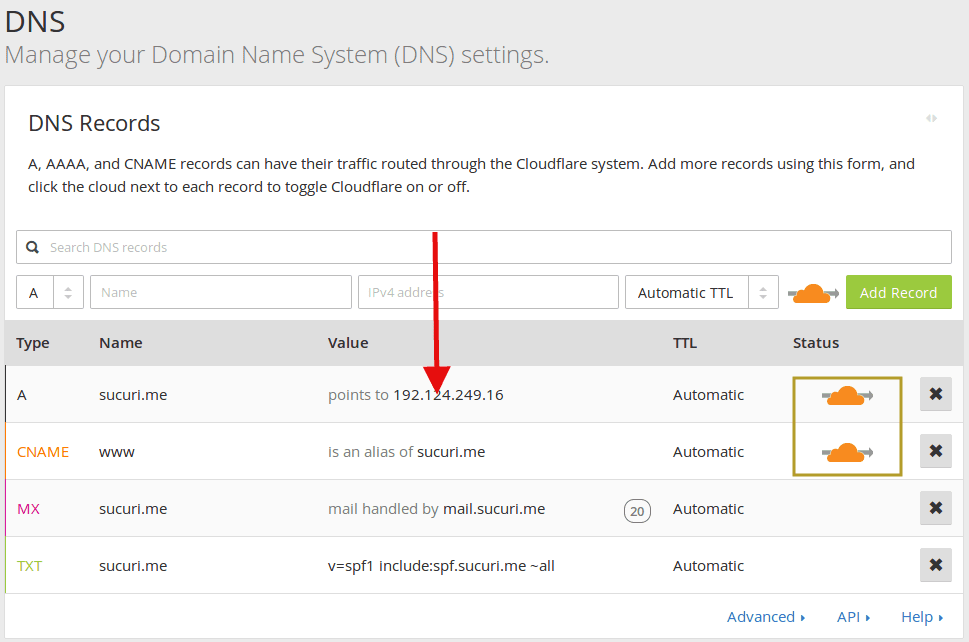
Also, set CloudFlare to active if it does not have the “orange” cloud.
That’s it. For other CDN providers, the process and known issues are pretty similar.